Art Doll Making Videos

Making Slimy Slug Art Dolls with Resin Slime 🐌

Today we'll be embellishing wooden display bases as we make slimy slug art dolls with resin slime! I'd previously sculpted these polymer clay slug art dolls with super sculpey over aluminum foil armatures, made these handsome display bases, and only recently had the idea of "slug trail" trailing behind them as if the slugs (slowly) made their way up on to the base.


WATCH MAKING SLIMY SLUG ART DOLLS WITH RESIN SLIME 🐌


I'd already given the slugs a thin coating of two part epoxy resin to give the sculpey art dolls a wet sheen look and I used the material again to make the slimy path for the little critters. Since I've had these particular opened bottles of epoxy resin for a few years, this was a great way to use the older materials rather than wasting them. 


SlugsArtDolls1.jpg

Slimy Slug Sculptures

These slug sculptures can slime their way to your home & heart.


To be the first to know when I launch new polymer clay art videos, be sure to subscribe to my YouTube channel and hit the bell icon. Catch all of my videos here:  https://www.youtube.com/thedreamsyndicatearts. You can also find many of the supplies I use in crafting here: https://www.thedreamsyndarts.com/supplies-gear/. And sign-up for my newsletter to get the latest studio goings-on! Thanks so much for joining me on this journey and until next time: Make. Believe!

How to Craft a Miniature Wizard's Wand

What's a wizard, warlock, or witch without an implement of arcane power?! In this video I show how to craft a miniature wand through an incredibly simple process. When making a mini wizard's wand with my process, there's plenty of room to customize the wand and make it unique to whatever wielder of wyrd eldritch power you like, whether that's Harry Potter or Gandalf the Grey (or White).


How to Craft a Miniature Wizard's Wand


This wand was crafted with an art doll in mind that was actually a character I played in the Pathfinder role-playing game, Fabian Faust, a conjurer of devils and demons with a snide, sneering disposition- safe to say he's a bit of a jerk (I'd imagine him talking like Timothy Spall, the actor who played Wormtail/Peter Pettigrew in the Harry Potter movies). I'd made an art doll of the character some time ago and decided it was time Fabian had his arcane armament.


To be the first to know when I launch new polymer clay art videos, be sure to subscribe to my YouTube channel and hit the bell icon (but because YouTube's wonky, you can also join the newsletter). Catch all of my videos here:  https://www.youtube.com/thedreamsyndicatearts. You can also find many of the supplies I use in crafting here: https://www.thedreamsyndarts.com/supplies-gear/. Thanks so much for joining me on this journey and until next time: Make. Believe!

Greetings & Welcome to the Dream Syndicate Art Dolls

How rude of me- I've yet to properly introduce my YouTube channel. In this video, I do just that by giving folks a taste of what they can expect from The Dream Syndicate Art Dolls with this channel trailer.


WATCH WELCOME TO THE DREAM SYNDICATE ART DOLLS


Throughout my videos, I share the process I use in crafting fantasy art dolls, showing you how I sculpt, paint, build, and paint them. I also show how some of the props are made for a photo shoot and a glimpse of what the photography sets look like for my dimensional art doll illustrations. When I'm not creating videos about making art dolls, I make videos about the arts, whether it's culture or thoughts about what it's like to be a professional artist today.


To be the first to know when I launch new polymer clay art videos, be sure to subscribe to my YouTube channel and hit the bell icon (but because YouTube's wonky, you can also join the newsletter). Catch all of my videos here:  https://www.youtube.com/thedreamsyndicatearts. You can also find many of the supplies I use in crafting here: https://www.thedreamsyndarts.com/supplies-gear/. Thanks so much for joining me on this journey and until next time: Make. Believe!

The Devil May Cry with this Devil Art Doll Repair 👹

This devil art doll's name is Diavolo Malvolo and he fits that old wedding tradition of something old, something new, something borrowed, and something new as the blue devil himself is an older work, the illustration's new, I borrowed some dry-rotted wood to make the "cliff" he's standing on, and well, the blue part's pretty obvious, isn't it? In this latest video, I take the devil art doll that's been sitting on my shelf and reveal his dark, disturbing secret... no, it's not that he's a devil- that much's obvious! The secret is this: he has crevice along his horn and ear- he's damaged goods. Over the course of the video I try to repair him, but do I succeed? Watch and find-out good viewer!


WATCH DEVIL ART DOLL REPAIR 👹


As you might have seen if you made it to the end of the video (I say in an accusatory voice), I made an dimensional illustration with this handsome devil art doll. If you'd like one to hang on your wall, you can order a print from my Etsy store.


You can bring this handsome devil home from my store.

You can bring this handsome devil home from my store.

Just in case you're still in suspense- I was able to repair Diavolo after all through the use of plumber's epoxy and epoxy resin as well as a fresh coat of paint. Huzzah! I hope you enjoyed your chance encounter with the devil! To be the first to know when I launch new polymer clay art videos, be sure to subscribe to my YouTube channel and hit the bell icon (but because YouTube's wonky, you can also join the newsletter). Catch all of my videos here:  https://www.youtube.com/thedreamsyndicatearts. You can also find many of the supplies I use in crafting here: https://www.thedreamsyndarts.com/supplies-gear/. Until next time, make. Believe!

BRAMBLING 🌲| Making a Fantasy Art Doll

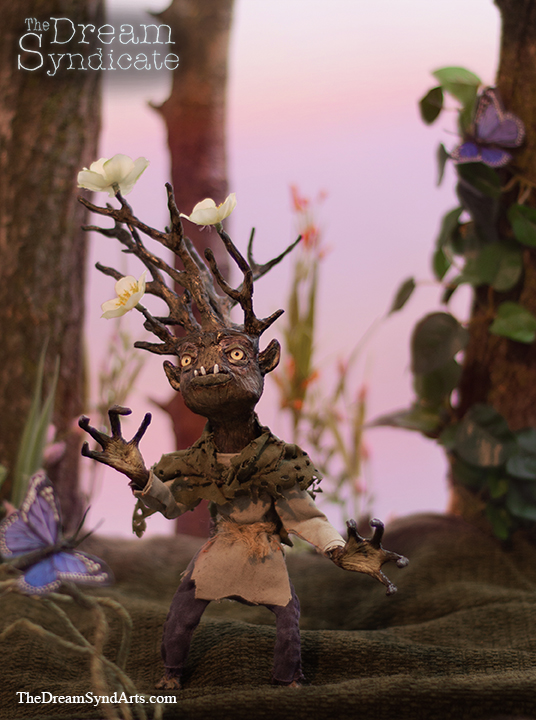
And finally, a brambling is full born... or is it sprouted from a little acorn? The biology of the little fae creatures aside, this fantasy art doll is completed! All told, he probably took around 16 hours to craft (including accidentally sculpting two right hands for him! Unfortunately, not the first time something like that's happened, I assure you!). In prior videos I shared the process of sculpting and painting him in-depth and in this most recent one, I sew his clothes and show-off a bit of the staged set that went into making the finished dimensional illustration.


Watch Brambling | Making a Fantasy Art Doll


I enjoy characters with fanciful clothing and while the brambling's clothes are meant to have a utilitarian, rustic look to them, I was able to add some visual interest with the fae creature's asymmetrical, tattered cloak. The clothing was distressed by wrinkling, staining with acrylic paint, sanding, and then hand-sewing the fabric directly on to the art doll's body. I usually make a point of distressing an art doll's fabric as i like the viewer to imagine the secret life that the art doll has when they're not around. A life with a bit of mystery and magic's a better one! Lastly I set-up the scene by arranging fabric, vines, butterflies, and even used some small tree stumps! I photographed this mixture of found objects and then spent a little time post-producing the image in Photoshop.


Here's the finished dimensional-illustration:

You can find a print of this illustration here: https://www.etsy.com/listing/601530840/brambling-fey-fantasy-fine-art-85x11?ref=listings_manager_grid

You can find a print of this illustration here: https://www.etsy.com/listing/601530840/brambling-fey-fantasy-fine-art-85x11?ref=listings_manager_grid


I hope you enjoyed exploring this magical fey creature as much as I have! To be the first to know when I launch new polymer clay art videos, be sure to subscribe to my YouTube channel and hit the bell icon (but because YouTube's wonky, you can also join the newsletter). Catch all of my videos here:  https://www.youtube.com/thedreamsyndicatearts. You can also find many of the supplies I use in crafting here: https://www.thedreamsyndarts.com/supplies-gear/. Until next time, make believe!

Painting the Brambling | Painting a Fantasy Creature Head

Now that the brambling's head is sculpted to my liking, it's time to lay down some paint! When painting a fantasy creature head, it's actually kind of important to ground yourself in realism because bramblings are elusive in the wild! I had to do the next best thing and bring a couple of tree branches into the studio. Who'd have thought realism's the best strategy when painting a fantasy creature head? By looking at this tree branch I could observe that it was largely a warm grey tone with moments of green and brown on it rather than that iconic brown Crayola crayon that we might all instantly imagine.


Watch the Brambling Head Be Painted with Acrylics Here


I used a range of earth-tones in painting the fey creature's head- siennas, umbers, ochers, and greens with touches of grey tones to dull-down the pigments. I also painted the head generally lighter than I would have naturally due to the fact that I was about to embark on trying my hand with an ink wash technique...

EXPERIMENTING WITH INK!

ACRYLIC INK

In painting this head, I tried a technique that was new to me: using an acrylic ink wash with dark toned ink. I had carved a lot of bark texture all over the brambling and I wanted a way to darken the recessed areas that didn't involve my painstakingly painting in dark tones and then carefully trying not to undo this work as I painted-in lighter tones. Before I used the technique on the actual fantasy art doll head, I tested on scrap sculpted piece I had (who'd have thought I was doing myself a favor when I accidentally sculpted two right hands for this art doll?!). Admittedly, I still feel like I can do a better job at highlighting sculpted details with this technique, but overall, I'm happy with the outcome.


If you would like a print of the Brambling final image, you can purchase it HERE.


I hope you enjoyed exploring this magical fey creature as much as I have! To be the first to know when I launch new polymer clay art videos, be sure to subscribe to my YouTube channel and hit the bell icon (but because YouTube's wonky, you can also join the newsletter). Catch all of my videos here:  https://www.youtube.com/thedreamsyndicatearts. You can also find many of the supplies I use in crafting here: https://www.thedreamsyndarts.com/supplies-gear/. Until next time, make believe!

Making a Brambling 🌲 | How to Sculpt a Fantasy Creature Head

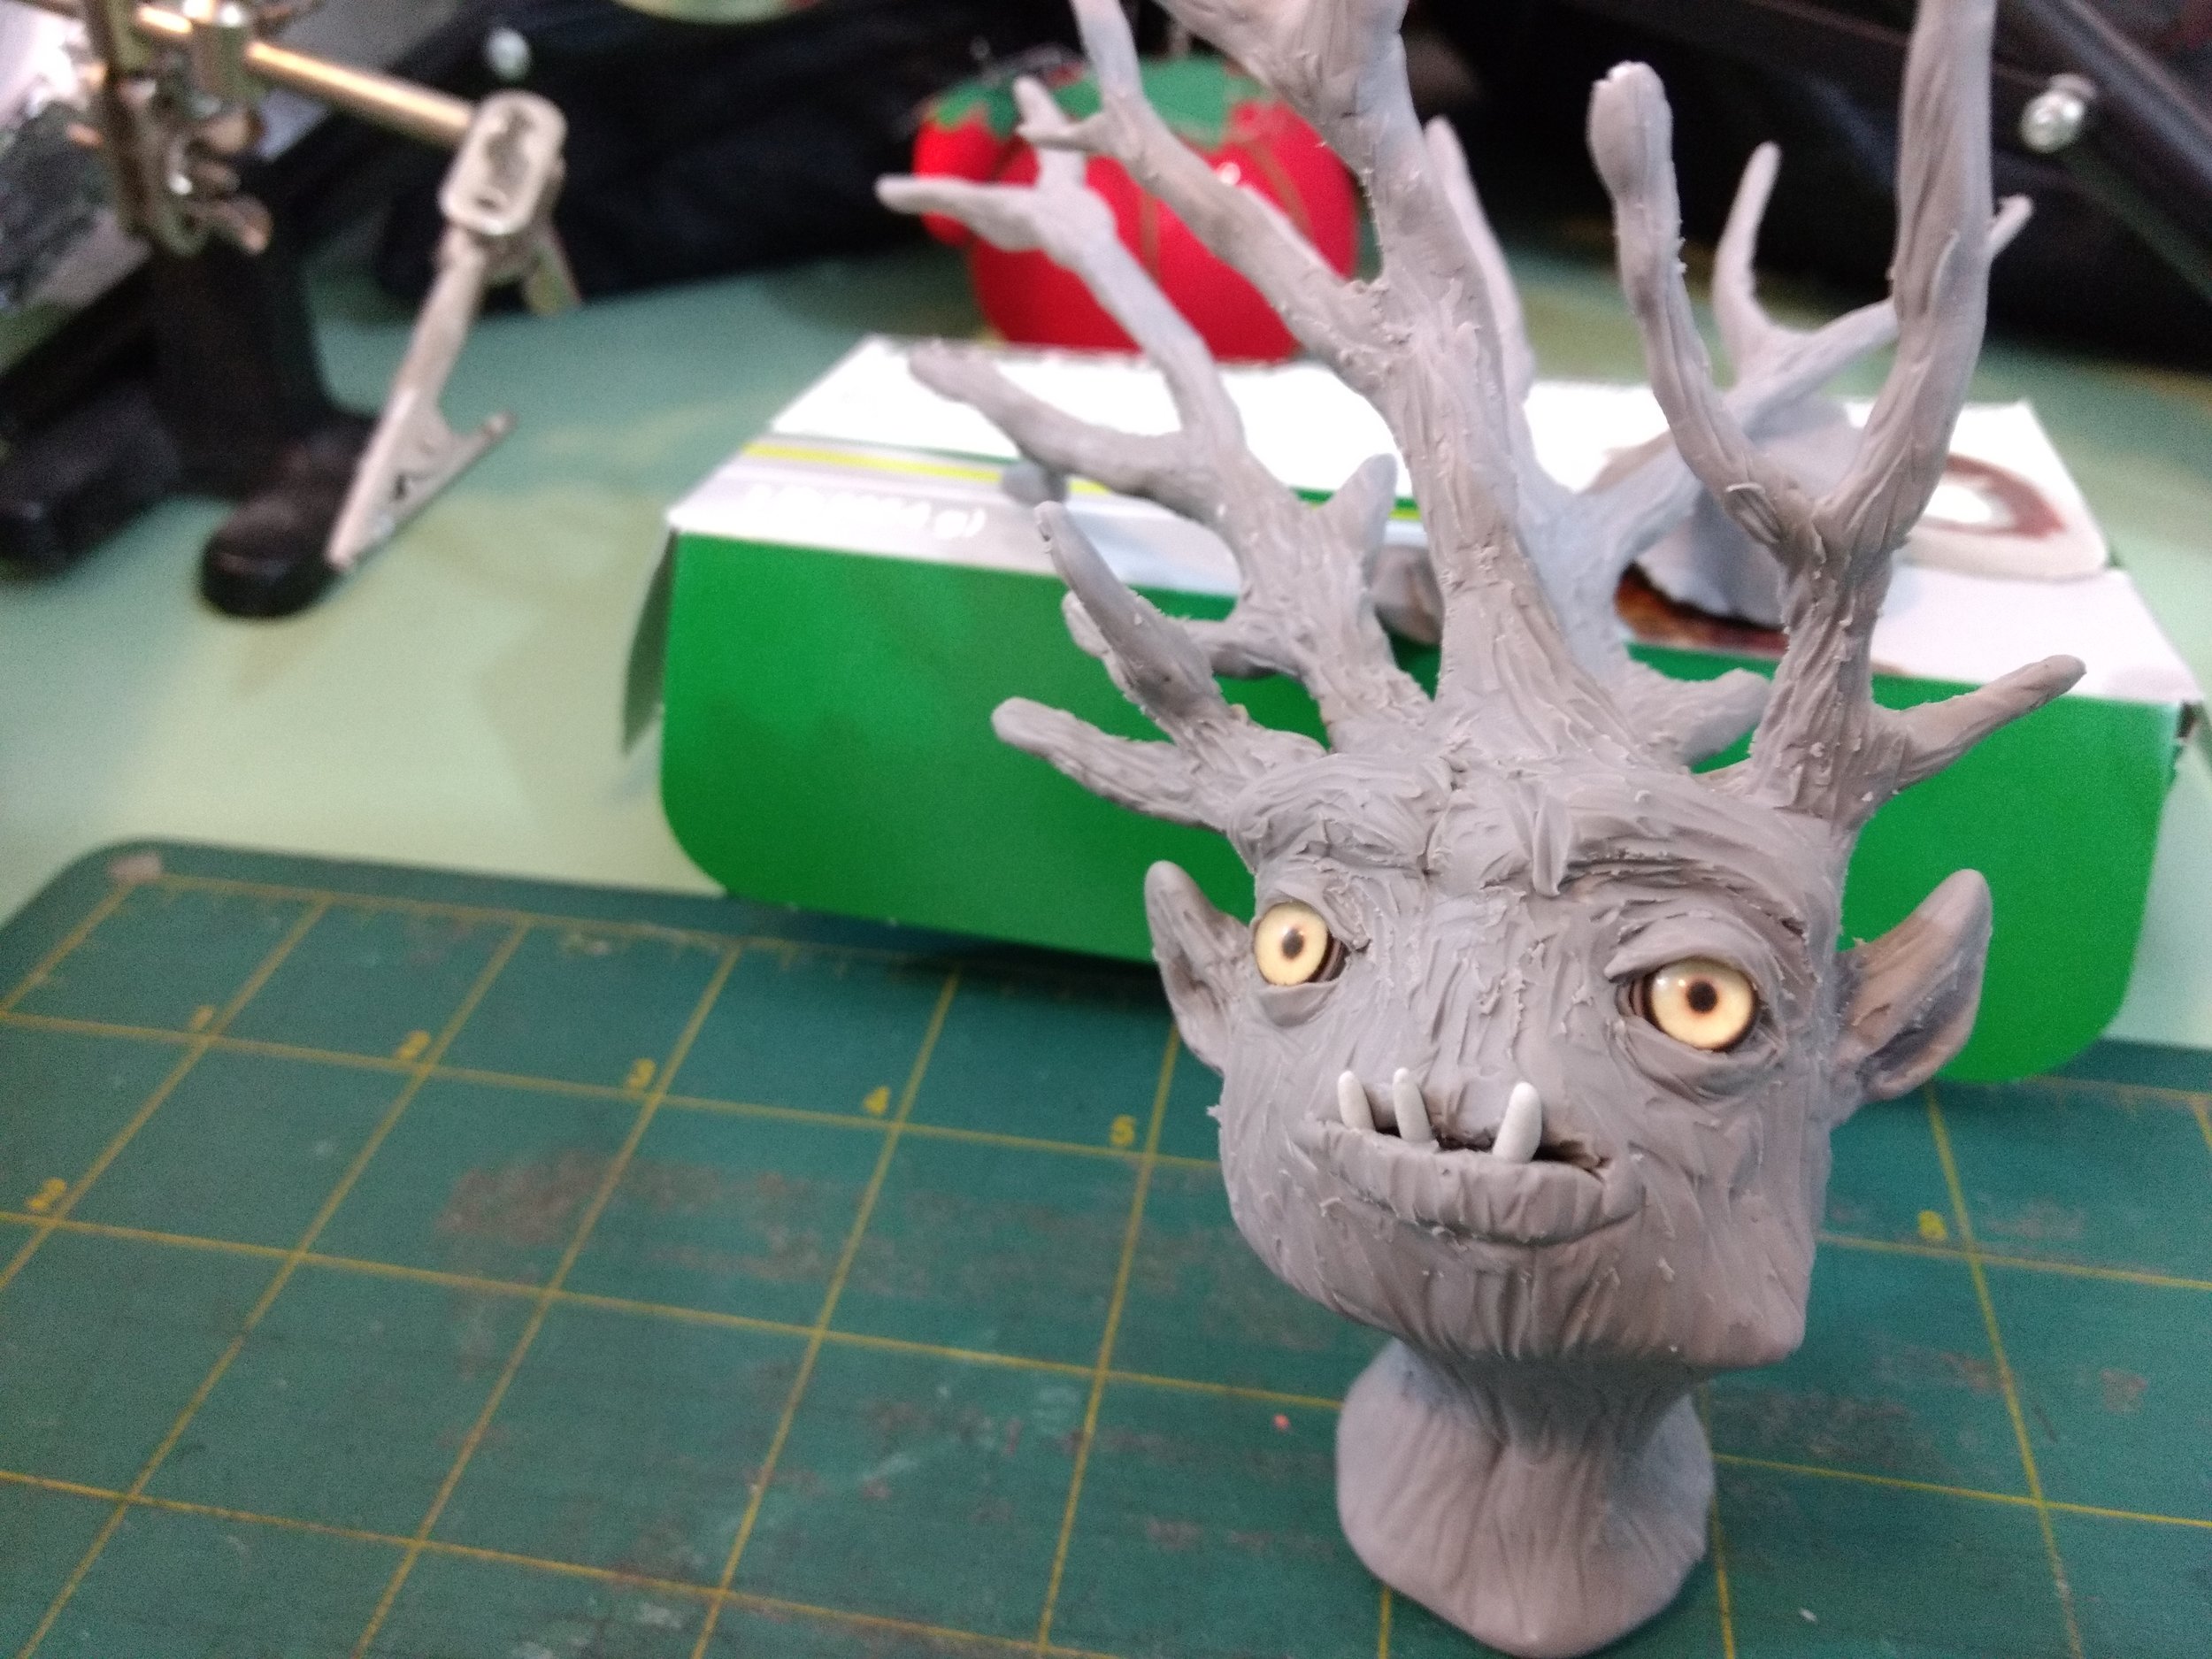
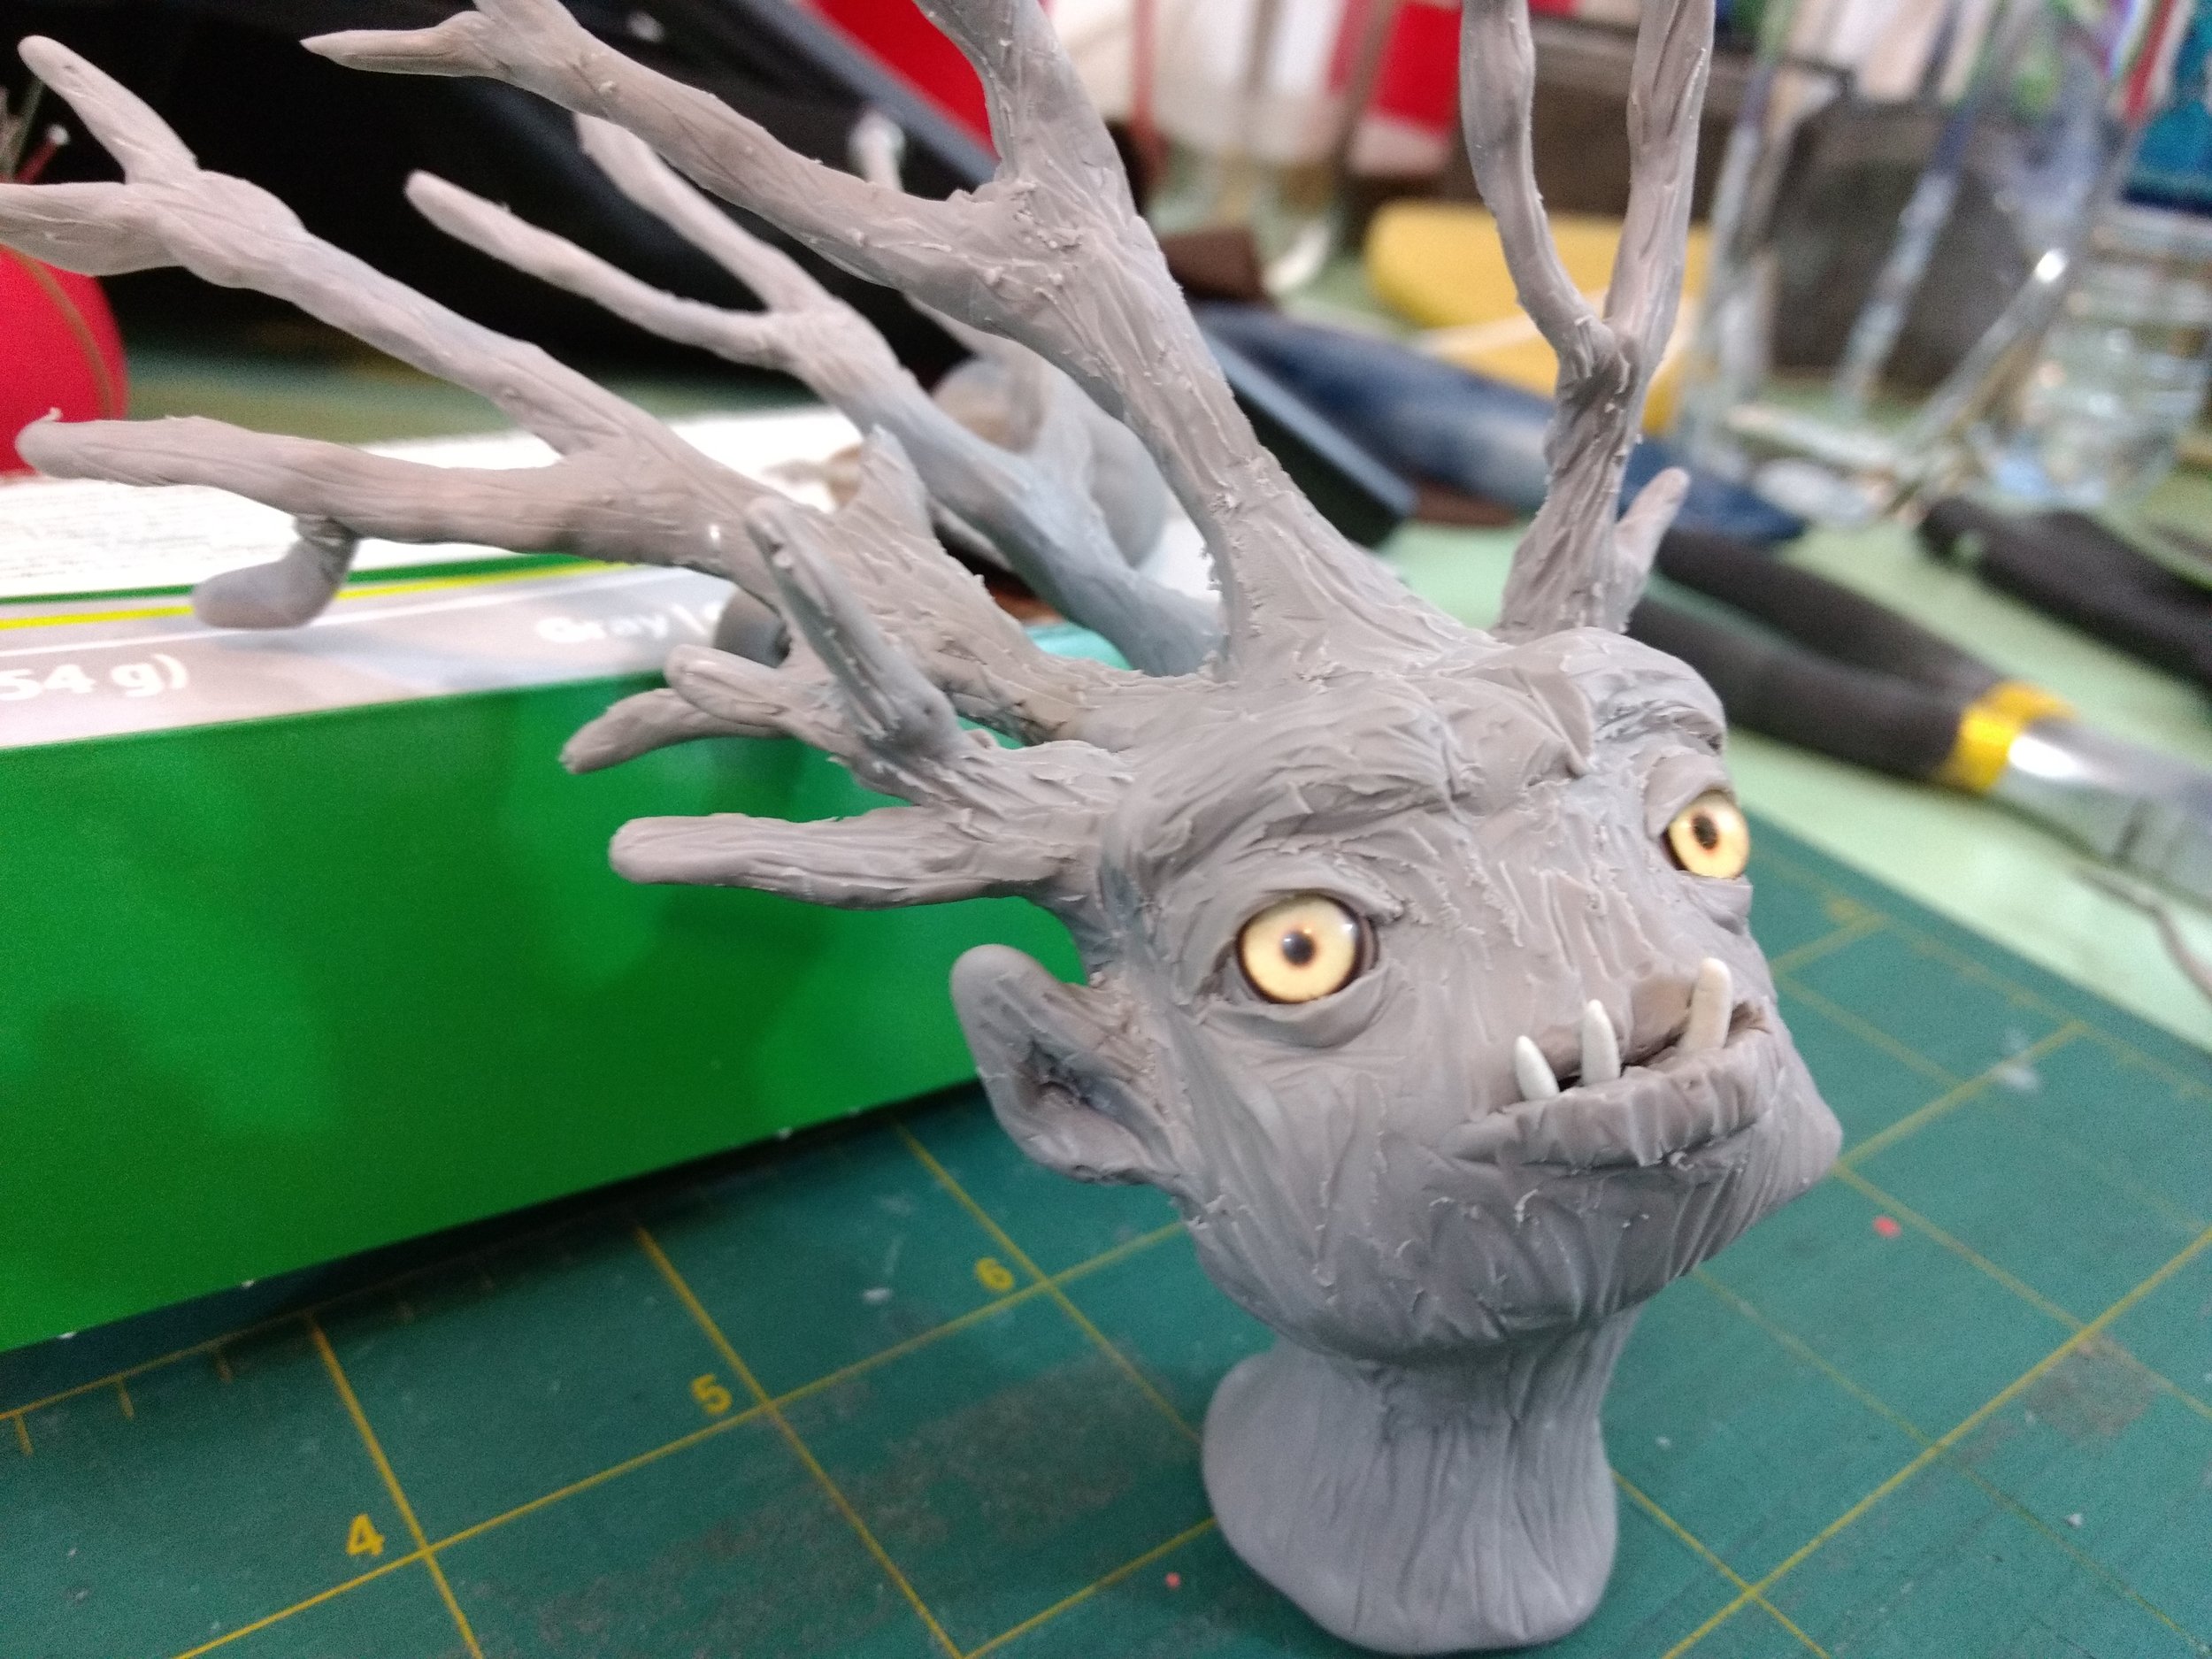
Bramblings are fey creatures that wander the forest floor looking for mischief to get up to or something good to eat. They can helpful to a lost wanderer or a nightmare to those that break some esoteric woodling taboo. The brambling has been living in my sketchbook for some time and I'm glad to see it finally come to life. I see them as a species rather than any one individual creature and being somewhat wild and unpredictable.


Watch a brambling get crafted here:

 
BramblingCrop.jpg


This fantasy polymer clay sculpture was crafted with Sculpey Medium Blend, which is a mixture of Sculpey's regular and firm variety, and was my first test with that particular clay (Super Sculpey beige being my "go-to: polyclay). While I found it pleasant to work with, I thought it had a pretty similar consistency to my regular clay. At some point I'd like to experiment with Sculpey Firm and see how that handles. I really could have stood to use a firmer clay since the oh so thin branches are a very delicate aspect of this art doll sculpture. I could see trying Firm or trying my hand at Monster Clay, which doesn't require baking in the oven since it's a two-part epoxy.


I spent a lot of time during the sculpting process creating the bark-like texture of the creature, smoothing-out and trying to create the delicate lines of the branches. I also sculpted tiny clay-like hands. I typically craft art dolls with poseable paper mache hands, but in this case I didn't think I'd be able to get the jagged texture of the bark with such delicate material.


If you would like a print of the Brambling final image, you can purchase it HERE.

A brambling in it's natural environment.

A brambling in it's natural environment.

I hope you enjoyed exploring this magical fey creature as much as I have! To be the first to know when I launch new polymer clay art videos, be sure to subscribe to my YouTube channel and hit the bell icon (but because YouTube's wonky, you can also join the newsletter). Catch all of my videos here:  https://www.youtube.com/thedreamsyndicatearts. You can also find many of the supplies I use in crafting here: https://www.thedreamsyndarts.com/supplies-gear/. Until next time, make believe!

Making Fabric Art Doll Hair?

In my latest video, I show you a method for making art doll hair with fabric. You can use most lightweight fabrics, but if you want to convey a realist hair look with your art doll, it's best to use a fabric with a sheen, a silk blend or sateen would do nicely. And bonus points if you keep on the look-out for cheap remnants or sales on natural or unnatural, if you're feeling adventurous, hair colors.


Watch Part 6 in the St. George & the Dragon Piece | FABRIC ART DOLL HAIR ⚔🐉:


Once you have the fabric you're going to work with, it's just a matter of playing around with arranging folds and creases on the head to give a look that emulates hair, putting a strong adhesive on the head (I tend to use a two part epoxy resin and some Fabri-Tac where needed), and then just sewing up the various seams that were created.


If you want to make the imaginary a reality, be sure to subscriber on YouTube!

If you want to be the first to know when I launch new polymer clay art videos, be sure to subscribe to my YouTube channel and hit the bell icon (but because YouTube's wonky, you can also join the newsletter). At present, I am launching new videos Saturdays at 2pm EST and I will keep this information up-to-date on my YouTube channel's banner and "about" section here:  https://www.youtube.com/thedreamsyndicatearts.

MAKING A ST. GEORGE ART DOLL ⚔🐉

In this part of the process of making a St. George art doll, the poseable doll's made from a variety of mixed media. Most of the materials your as likely to find in a hardware store as you are an art supply or hobby shop. The armature consists of twisted aluminum wire, aluminum tubing in the neck and used at the forearms, a length of steel wire to give the figure stability and allow it to anchor into a set or display base, and plumber's epoxy. The body's massed-out with upholstery foam and then clothing's sewn around the art doll.


Watch Part 5 in the St. George & the Dragon Piece | MAKING A ST.  GEORGE ART DOLL ⚔🐉:


An art doll's neck doesn't need to be reinforced with the aluminum tubing, you can typically just drill right into the clay if you'd like, but the way I design my characters, I like them to have thin necks because that's the way I tend to draw figures- I like lanky, gawky, attenuated characters. If I were to make a character's neck as thin as I do without putting in the tubing and drill into it, the backed polymer clay would likely crack and crumble around the drill bit.


Once the aluminum and steel wire are all twisted into place, they're secured with plumber's epoxy that's molded into a form to create a cylinder shaped chest and smaller oblong cylinder for the pelvis, which all takes about an hour to set (if you were handling the plumber's epoxy more vigorously, you might want to give it a day). From there, I use the figure's contours to sketch-out a front and back form out of the upholstery foam and cut it out with pair of scissors. These front and back pieces get attached to the plumber's epoxy with a resin based epoxy. Lastly I sketch-out the amount of fabric I'll need to sew the clothing, leaving a bit of a seam allowance. Ordinarily, it's a good idea to use lighter weight fabric, but for the look of the chain-mail armor, I used a heavier upholstery weight fabric that was kind of a pain to work with. The process of making St. George art doll probably took a couple of full work days, not including the time I spent sketching-out details or gathering materials.


If you want to make the imaginary a reality, be sure to subscriber on YouTube!

If you want to be the first to know when I launch new polymer clay art videos, be sure to subscribe to my YouTube channel and hit the bell icon (but because YouTube's wonky, you can also join the newsletter). At present, I am launching new videos Saturdays at 2pm EST and I will keep this information up-to-date on my YouTube channel's banner and "about" section here:  https://www.youtube.com/thedreamsyndicatearts.